

How To Set Up Guitar
At that place are many reasons your guitar may need a guitar set-up and over my years as a Luthier, I have seen a multitude of problems with both old and new guitars that accept not been maintained or gear up correctly.
High action, potent action, buzzing frets, dead notes, poor tuning or intonation…they are all symptoms of an instrument that needs a setup.
Whether you are an experienced thespian or a beginner, giving your guitar a set up on a regular ground is an important part of learning to treat and maintain your guitar.
The good news is that yous don't have to be a pro to address the standard issues. With a modest investment in tools and some basic cognition, you can solve a lot of these things yourself.
What Is a Guitar Setup?
Before we make our commencement adjustment it is important to understand what exactly a guitar setup is and what it is we are trying to achieve. Past understanding this nosotros are then in a position to start making adjustments with the overall goal in listen.
And so what is a guitar setup? A guitar setup is a series of adjustments that achieve a balance between 3 components: the neck, the nut, and the saddle.When these adjustments are completed in the correct sequence they will ensure that the guitar is optimal, both in sound and playability. Carried out on a regular basis, a setup will assistance maintain the health of the guitar through its seasonal changes.
In order to do your own guitar setup, yous demand to know how these 3 things work and how they relate to one another but firstly y'all will need some tools.
What Tools Do Yous Need For A Guitar Gear up?
If playing guitar and or maintaining them is something that you lot want to practice on a regular basis then I would recommend ownership quality tools. Stewmac has the best reputation and the best tools, hands downwardly. I worked at that place for many years and now employ their tools in my own luthier workshop.
Alternatively, if you lot want some decent equipment that is well priced, I have provided some recommendations beneath. You won't need all of these if you lot are just working on i type of guitar electric or audio-visual.
Essential Tools – Budget
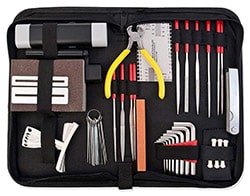
Guitar Maintenance Kit
Essential for both Acoustic and Electrical Guitar.
This extensive starter kit is platonic for the guitarist but getting started with guitar maintenance.
There volition exist a couple more items that you lot will demand on top of this.
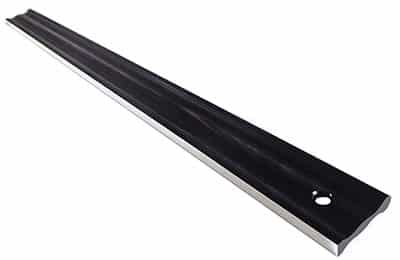
18″ Straight Edge
Essential for both Acoustic and Electric Guitar.
The best way to judge relief on the cervix of the guitar is with a direct edge.
Having 1 will also brand information technology
easier for you to determine if you lot have a back bow.
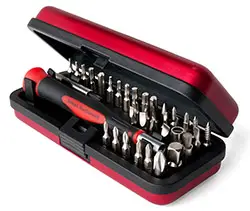
Guitar Screwdriver Fix
This is mainly for an electric guitar and is an fantabulous kit from StewMac. Nigh guitars have a multitude of fixings in dissimilar sizes and this set is ideal.
If you accept an audio-visual and so yous will probable take a screwdriver at habitation that will practise all y'all need or you could buy one from a hardware shop.
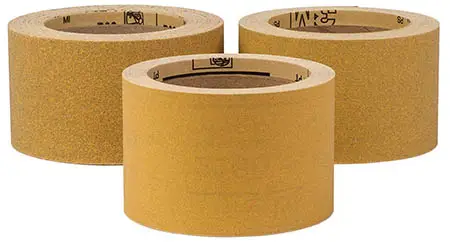
Self Adhesive Sandpaper
Acoustic Guitar Saddles Only.
For an acoustic guitar saddle that needs to exist lowered in height, use self-adhesive sandpaper.
120 – 200 grit is recommended unless you have a lot to take off and brand sure to use it attached to a hard, smooth and flat surface.
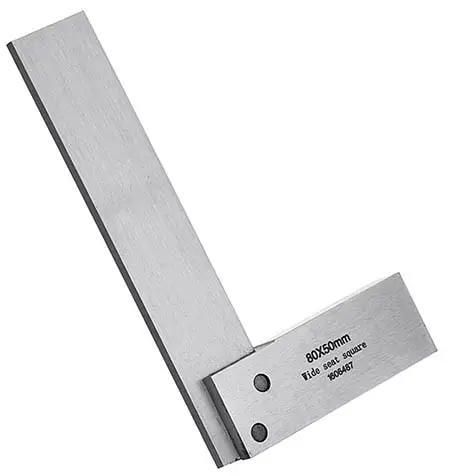
Foursquare
For Audio-visual Guitar Saddles Simply.
Make certain the saddle is square after you have sanded information technology down to reduce the pinnacle.
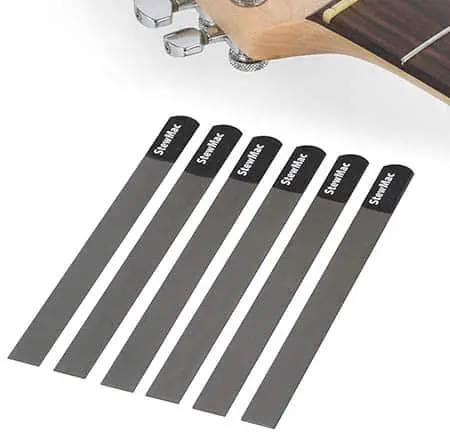
Nut File
Essential for Acoustic and Electrical Guitar.
Nut Files are bachelor in unlike sizes dependent on the gauge of strings y'all like to utilise.
The one in this link is for medium gauge for an Electric guitar but yous tin get light and heavy gauge files also.
Truss Rod Wrench
Depends on the Guitar.
On top of these tools, you lot may need a socket wrench if the hex key wrenches in the set above do non fit your truss rod. Y'all can find a expert selection hither on Amazon one time you lot know what size yous volition need.
Capo
Essential for Acoustic and Electric Guitar.
Normally I would propose you on purchasing a Shure S1 Capo as per my tried and tested review which you lot can detect here Best Guitar Capo Nether $20.
Nevertheless, in this circumstance, you are best off with a spring action clench Capo as they are quicker and easier to apply and have off. One like this Kyser (click here to check price on Amazon) would be ideal
Guitar Tuner
Yous tin download a free chromatic tuner app and this will work fine for this practice. Like this one for iOS or this ane from google play.
Non-Essential Tools – But Worth Owning
These tools will make it easier to do your guitar setup just they are not essential to perform the task. After doing a few setups though you may feel differently, I know I did
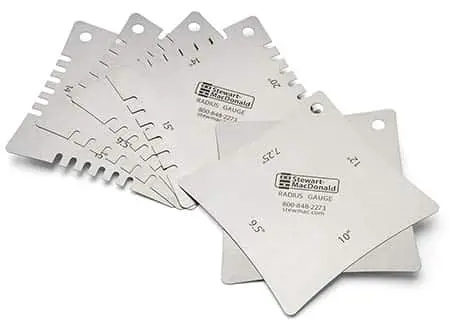
Notched Radius Gauge
Yous tin can use the under string radius guess instead of these but yous will need to move the strings out of the way.
These Notched Radius Gauge's save the hassle.
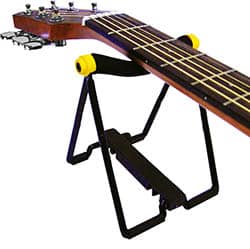
Guitar Cervix Support
Keeping the cervix supported can be a pain and an unnecessary distraction when making adjustments to a guitar and when changing strings.
A guitar neck support is ideal for solving this problem.
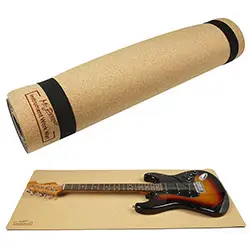
Guitar Work Mat
A guitar mat helps continue your guitar still and safe from scratches.
If yous care about your guitar these are worth purchasing.
How To Practice Your Own Guitar Setup
This step past step guide will encompass the nuts of setting upwards your guitar. It will assume that the essential geometry is correct and that there are no major fret issues or structural problems. If y'all have a new guitar or one that is otherwise in good shape, this guide will exist perfect for you.
Fundamentally these methods utilize to both acoustics and electrics, but I will point out differences in approach as they ascend.
Showtime With The Neck Of The Guitar: Adjusting The Neck of A Guitar
Every bit previously stated, a good fix-up is a balance of the neck, the nut, and the saddle.
The saddle is separate from the span. On audio-visual guitars, information technology's the material in the slot of the span, and on electrics, information technology is the individual adjustment pieces the strings ride over.
The nut is the piece at the end of your neck that spaces the strings coming from the headstock.
Always outset with the cervix, or more than specifically, the truss rod. A truss rod is a machinery that counters the pull of the strings. When a guitar is tuned to pitch it exerts pulling strength at the headstock and bridge, and down force at the nut and saddle. This will crusade your neck to bow.
At that place are some things you need to understand in order to adjust your truss rod successfully. With a grasp of how your specific rod works, the proper adjustment tool, and some practical caution, adjusting a neck is a simple operation.
Know What Type of Rod and Adjustment Nut You Have
At that place are two types of truss rods: unmarried action that counters the pull of the strings, and double-action that will counter the strings and too button the neck in the direction of the string tension.
Double action rods are useful for stubborn necks that don't have typical reactions to the pull of the strings. A cervix with a back bow (a bow in the opposite management to the pull of the strings) will outcome in an unplayable guitar.
Without a dual-action truss rod, the only fix for this is a more serious repair that can include major fretwork and sometimes heats straightening. Over aligning of either rod will issue in a back bow, and loosening the rod should take intendance of that in a properly operation guitar.
How To Identify What Blazon of Rod and Adjustment Nut You Accept
Information technology may not be easy to tell if you lack experience, but the bulk of rods are unmarried activeness. If yous accept an American fabricated Gibson, Martin, or Fender, or nigh whatsoever vintage guitar, you almost certainly have a single action rod.
If you lot are however unsure, and so this video will help yous identify what type of truss rod you have.
You tin can check with the manufacturer for the details of your specific guitar, only if your adjustment nut is not removable, you have a two-way rod. If you loosen the nut and you are able to see that yous are exposing thread on the rod you lot are working with a single activeness.
What Tools Do You Need For A Truss Rod?
Y'all will need to know what the proper adjustment tool is and never force a rod that doesn't want to motility as this could cause serious problems and a plush repair.
Sometimes you tin can clearly run across what the nut looks like and what tool you will demand, simply some are not and then easy.
Checking with the manufacturer or searching the net should tell y'all if you lot are unsure. The most important matter to consider is that the wrench fits the adjustment nut with no slop.
Even if you accept the correct tool, the nut may exist worn or stripped and y'all could cause farther damage trying to accommodate it. Truss rod repairs tin be an expensive endeavor, and so make sure you accept the proper tool and don't force anything. If the nut turns merely seems sticky, it may need to exist cleaned and oiled.
How To Suit The Neck of A Guitar
When you tighten your truss rod nut clockwise it volition straighten your cervix (or force information technology into a back bow,) and when yous loosen information technology counterclockwise the neck will relieve with the pull of the strings into a frontward bow.
Near necks do not stop up completely straight, and the amount of bow you decide to leave in your neck is referred to as relief. You will find many opinions virtually the amount of relief you lot may or may not need in a neck, merely ultimately it is a matter of preference, technique, and the private personality of the guitar.
I believe the best playing and sounding guitars have the straightest necks. I won't become into swell detail explaining my theory backside this, just decades of setting up countless guitars of every blazon have led me to this conclusion.
Withal, at that place are valid reasons for wanting some curve to your neck. The physics of a moving string dictate that it moves well-nigh at the center of it's opposing points. Some relief will provide a little extra clearance above the fret in this area.
To achieve the optimal set-upward, I believe it is always best to commencement with a neck that is every bit straight as possible and add relief as needed. A neck with too much relief can suck the tone out of a guitar, and when the neck is direct the action stays more uniform as you motility upward the frets.
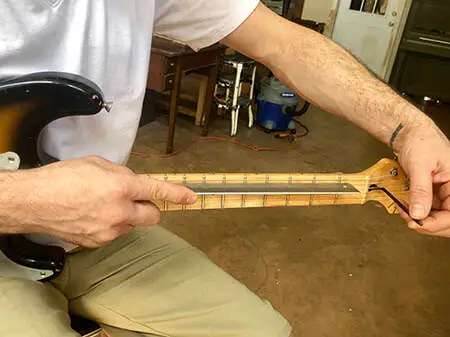
Step 1: Tune The Guitar To Pitch
Tune the guitar to pitch. There is no reason to detune if the cervix is practiced and you lot have a properly functioning truss rod. Another important thing to continue in mind is to ever check the straightness of your cervix in the playing position.
Gravity has a pregnant influence on the cervix, and the corporeality of relief will wait drastically different when the guitar is laying on information technology's dorsum equally opposed to sitting upright.
TIP: It's ok to arrange the rod while it's laying flat if you prefer, merely always check the results in the playing position.
Step 2: Check How Much Relief Yous Have
Now bank check the amount of relief you lot have. Identify a capo at the starting time fret or hold the string down with your finger, and fret again around the body joint where the cervix starts to thicken, this is usually around the twelfth to14th fret. So note the gap between the string and the top of the fret in the eye of these two points.
Moving the string upwardly and down over this fret will make it a little clearer, and this is easier if you lot are using a capo at the first fret instead of tying up both hands. Y'all volition need to bank check both E strings equally the amount of curve can vary from 1 side of the neck to the other.
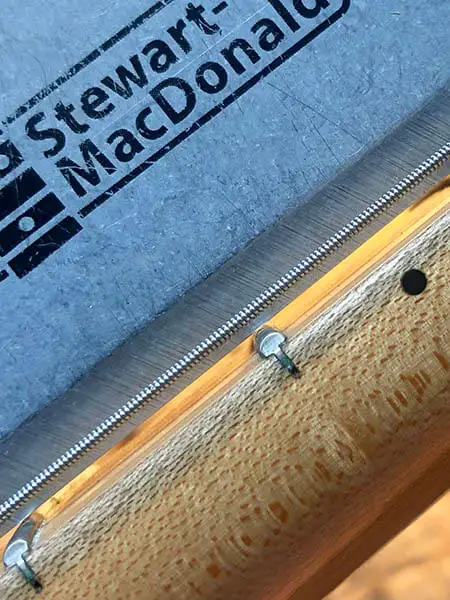
The best way to judge relief is with a straight edge, and a direct border volition get in easier for y'all to determine if you accept a dorsum bow.
For full general purposes, I use an eighteen" border. You lot can discover inexpensive edges on Amazon merely I find the ones available from Stewmac to be of excellent quality and worth the money. When using a straight edge I also cheque between the D and M strings to get an average between the two extremes.
It's a good idea to cheque the neck starting at the second fret to see if information technology looks any dissimilar. If the kickoff fret is loftier or low it can throw off the reading and this is will verify what you saw. The reading at the get-go fret and second should expect about the same. If the gap is smaller, your first fret may exist loftier.
If the neck is directly from the 2nd fret down and the beginning fret doesn't touch the direct border, then information technology is low.
Fretwork is a vast subject that I won't get into here, and so if either of these is the instance and you are non comfortable with treatment fret problems, have the guitar looked at.
TIP: As stated earlier, do all this checking in the playing position, and placing a light below yous volition assist to illuminate the gap for clearer reading.
Step three: Adjust The Neck Of The Guitar Straight
Fifty-fifty if the neck already has relief, information technology is a skillful thought to loosen the rod a niggling beginning to see how tight the nut is and to verify it is working properly. It shouldn't be excessively tight and the gap should increase as you back off.
I too prefer to straighten a bowed neck rather than bow an overly direct one. It keeps positive tension at the truss rod nut, and it'southward easier to read a cervix while straightening.
Through many years of exercise, I've adult the dexterity to concur the direct edge in the heart of the neck and watch the gap disappear equally I tighten the rod.
It'south as well just fine to practise this with the guitar on information technology's back, only tighten about a i/8th to a 1/4 turn and recheck the neck in the playing position until y'all have eliminated the gap. Information technology shouldn't take more than a 1/2 turn or so in about cases.
If there is no gap and you can pivot the direct edge off of the center of the neck, you lot have gone too far and you lot'll need to back off the truss rod.
If this happens, bow the cervix and and then bring it back to straight. Keep in listen you may not be able to get the neck straight, or perfectly straight, everywhere. In this instance, merely go with every bit close as you tin get with no back bow anywhere.
For me, a perfect cervix is dead straight on the treble side and has but a few thousandths of relief on the bass (nearly the amount of the thickness of a sheet of notebook paper,) only this isn't something you can necessarily control.
Call up…we are getting the neck as directly as possible in this stride, we may add together some relief later on.
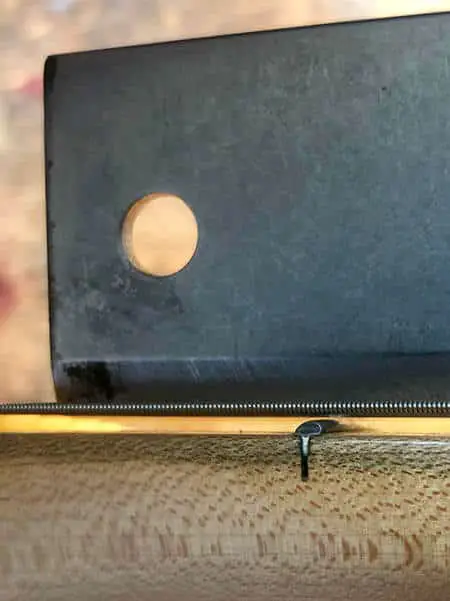
Step four: Interim Adjustment To Nut – Capo Required
This will be an interim footstep and we will come dorsum to actually adjusting the nut slots afterwards. For now, we are substantially going to eliminate the nut and set information technology to zero. You will need a capo, and for repair purposes, I prefer the Kyser (click here to check price on Amazon).
Identify the capo only behind the first fret.
Step v: How To Adjust Saddle Meridian and Radius
This is where electrical and acoustic fix-ups differ.
With an electric, you will exist able to make your adjustments but with a wrench, but when dealing with an audio-visual saddle you lot will need to add or remove material.
TIP: Doing this pace properly requires some tools. For both you will need a ruler that measures accurately to at least i/32", and a set of radius gauges capable of measuring both the top of the fret and underside of the strings. These are included individually or in the StewMac setup kit, and also easily available on Amazon.
I will break this step into 2 sections to make it easier to follow and better illustrate what tools you volition demand.
Electrical Guitars
In that location are many different types of bridges all with unlike saddle adjustments. Yous will need to determine what yours is, and if y'all accept a Gibson style Tune-o-Matic span you volition demand a set of nut files to lucifer each string.
A tremolo will also make this stride trickier considering you might need to deal with balancing the bridge by adjusting the tremolo claw that anchors the springs to the guitar.
And so let'south impact on that first.
You'll need to find the balance betoken for the tension of the strings then that the bridge sits level. Information technology is important to sympathize that as you tune the guitar the corporeality of tension on the bridge changes and will cause it to motility, and conversely, as you adjust the tremolo your tuning will change.
TIP: Make small adjustments incrementally, and after irresolute one you will need to get back and readjust the other…it'southward circular and can be very frustrating if you lot don't understand the relationship.
Tune the guitar to pitch. When tuning a guitar with a tremolo, I ever tune back and along to bring up the tension on the tremolo evenly: E to E, A to B, D to G.
Because the tremolo is rise every bit you tune-up in pitch, you volition likely notice you are apartment when you lot are washed. So yous will take to repeat that process until y'all are in melody and the span finds its balance.
Once in melody, check to see how level the span is to the top of the guitar.
You will demand to accommodate the screws of the claw in to pull the bridge dorsum or let them out to let the bridge to rise. Do non motility the hook the full corporeality all in one aligning.
Recollect that every bit you change the position of the hook you are also changing the tuning of the guitar and will need to re-tune, which in turn will alter where your bridge sits.
TIP: Yous are trying to accomplish equilibrium. So make small adjustments to the claw, re-tune and bank check once again until you observe the point that the trem levels when you lot are in melody. It can be tricky and volition take some practice if you've never done it.
Cheque the radius of your fretboard. This applies to both electric and acoustic. Information technology's handy to take a set of notched radius gauges. If you don't take a gear up you lot will need to loosen the strings and move them out of the way to check. You need to know what the fretboard radius is and then that you lot can set the underside of your strings with the saddles to match.
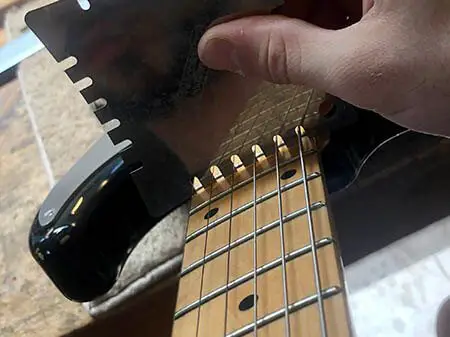
At present set up the pinnacle of the two Eastward strings, and just like the truss rod adjustment, check these measurements in the playing position.
I start with 1/16" (i.5mm) from the tiptop of the fret to the lesser of the treble E string at the 14th fret and three/32" (ii.5mm) on the bass. These measurements are judge and we will likely go dorsum and readjust them later based on how the guitar feels.
In one case the Due east strings are set, use the under-string radius gauge to prepare the saddles to the fretboard measurement yous took. It is easiest to heighten the 4 heart strings upwardly high until the estimate is only touching the E strings and and so lower them downwardly to the approximate.
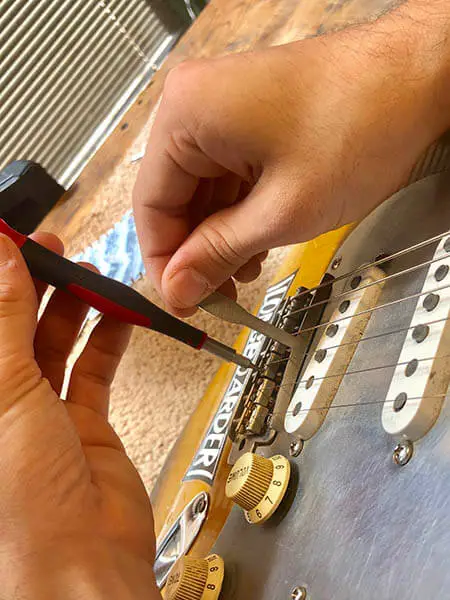
If you accept a tune-o-matic span you will need to utilize nut files for this, and if the eye strings sit below the radius you will need to use the thumbwheels to enhance the E strings up college and then lower them to the 3 and two measurements with the files in order to set the radius of the middle strings.
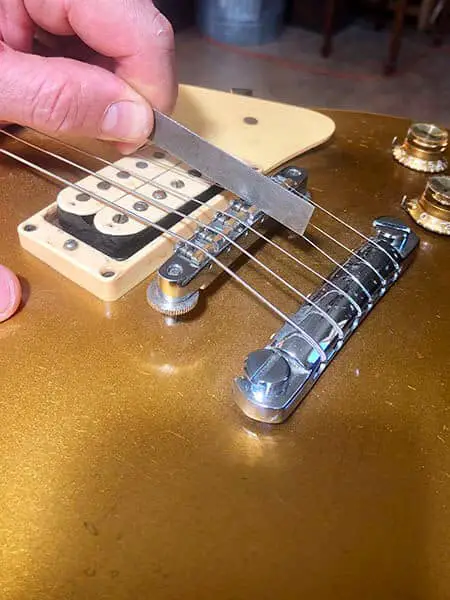
Angle the file with the approach of the string from the tailpiece, and use a file of the same gauge as each cord. Remove small amounts at a time until y'all get where you need to be. Employ some fine sandpaper to remove whatsoever sharp edges in the saddle when you are done.
Acoustic Saddles
Acoustic saddles are more involved and crave greater skill.
I volition focus on properly fabricated saddles that are just a scrap high or low, but first allow's talk about bug that may require the help of a repairman.
The best saddle material is bone. If yours is plastic or some blazon of synthetic material and you desire the best tone possible, have information technology replaced with bone.
If your saddle is loose in the slot it should also exist replaced.
When the saddle fits properly you should be able to grip it and elevator the guitar up off of the bench a picayune, simply information technology shouldn't be so tight yous can't remove it easily with your fingers.
Poorly fit saddles will somewhen cause cracks in your span.
We previously went through how to cheque the radius of your saddles on an electric, and it's the same procedure for an acoustic.
If your saddle is significantly off and this is all new to you, and so you should also make a trip to the repair store. I could take up an entirely new article with the techniques necessary to make a adept saddle, and reshaping the top of ane to lucifer a radius crosses into that territory too much for our purposes here.
Other things to look out for are cracks, major fries, and significant string habiliment. These tin all be signs of a saddle that needs replacing.
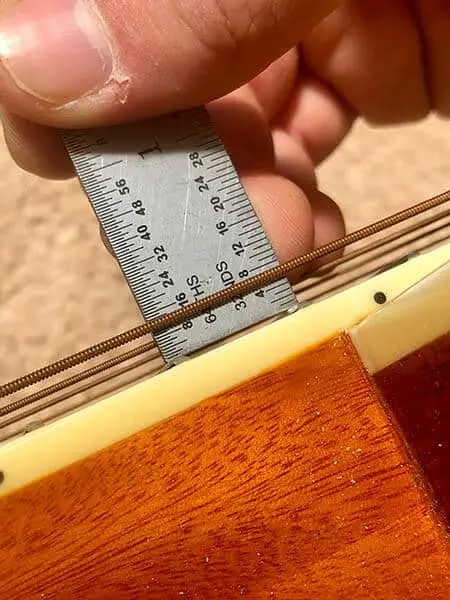
Once y'all take verified your fretboard radius and checked the saddle to make sure it matches, take string height measurements with a straight cervix and a capo at the showtime fret in the aforementioned style as described previously.
The merely difference hither is that you volition want to beginning a little higher than an electrical. On the bass Due east, you demand only under a 1/8th inch (near 3mm) and 3/32" (almost 2.5mm) on the treble in the playing position. Recollect, these are ballpark measurements that we can fine-tune afterward…information technology's better to be a little high on an audio-visual considering it's easy to remove more material and harder to bargain with if you go too low.
To get downwards to these measurements requires yous to remove the saddle and take cloth from the lesser. You volition need a difficult flat surface and some cocky adhesive sandpaper. I like to use thick tempered glass, and I prefer the 3M make sandpaper, simply there are a diversity of options here. I use 120-220 dust unless I have a lot to remove. Just brand sure whatever surface you choose is hard, smooth, and apartment. If you have steady hands y'all can even utilise a belt sander.
Remove the saddle and mark a line on both sides of the saddle with a sharp pencil that represents the amount of cloth you lot were above your measurements at the 14th fret. It'southward not a one to 1 modify here, and so we will merely remove to the bottom of our pencil line.
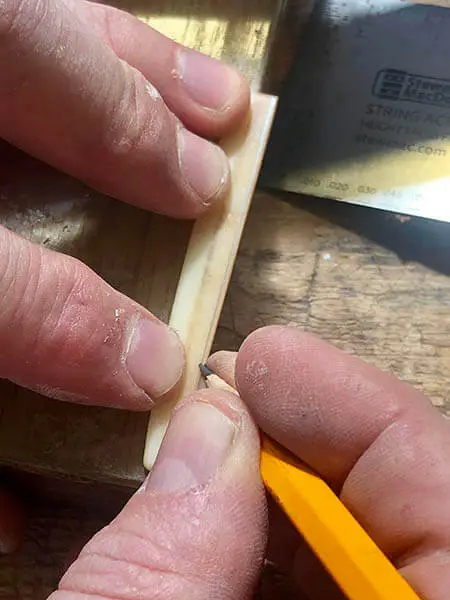
Using the sandpaper and the flat surface, elevate the saddle towards you lot being careful to keep information technology ninety degrees to the sandpaper.
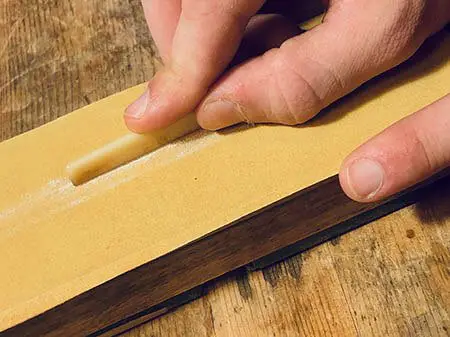
TIP: Do not sand dorsum and forth, I find that pulling the saddle in 1 direction only (towards myself) is the best way to keep control and ensure the base of the saddle stays flat.

One time y'all get close to your pencil line, make sure the bottom of the saddle is square. Replace the saddle, tune the guitar and cheque your measurements over again. Repeat the process if you are yet likewise high.
If you lot are too low, you have two choices: replace the saddle, or shim it. In general, I prefer to supervene upon, but sometimes a shim is warranted. I prefer to apply wood as a shim and you tin find thin purfling at StewMac or woods veneer available online or in hobby stores.
TIP: If yous have to shim much more than virtually 1/32" it'due south probably a better idea to replace the saddle.
The preshaped saddles from StewMac are an option if the saddle should be replaced and you'd like to try it on your own. You lot'll nevertheless need to practice a fair amount of work to fit it properly, just much of the shaping work has already been done for you. You'll need to cutting it to length and thickness it and prepare the elevation in the same manner as we have discussed here.
Step vii: Setting The Nut Top
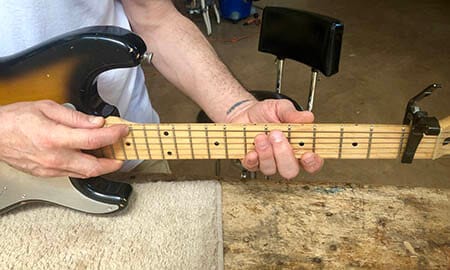
When you are satisfied with your saddle height, remove the capo and spend some time playing the guitar. Meet how the activity feels and check for string buzz.
Bend notes in the upper frets if you're setting up an electric to be sure zippo dies out at the top of the bend. If you lot are getting too much dissonance, enhance the two E strings past 1/64" (about .5 mm) at a time and reset the saddle radius on an electrical.
Repeat this until you find the acme that works for you. If you are setting upwards an acoustic, this volition crave shimming.
If information technology plays cleanly but still feels a piffling potent, it may exist best to go out it where information technology is for now and set the nut. String pinnacle coming off of the nut makes a big touch on playability and you may find information technology all feels right once that is done. If non you can always become back and lower the saddle some more later.
If the guitar seems to play well at the higher annals, but you lot are getting buzzing in 3rd-7th fret range, you may need a piffling more than relief in your neck and you can loosen the truss rod a fiddling.
TIP: Don't go too far. Modest adjustments to the rod can brand big changes. And changing the curve of your cervix affects the meridian of your strings (both at the nut and saddles,) so if you readjust the neck, you may need to reset your saddles. Remember, all three aspects of the set-up (neck, nut, and saddle) are related, and when you make changes to 1 you oftentimes need to make changes to all 3.
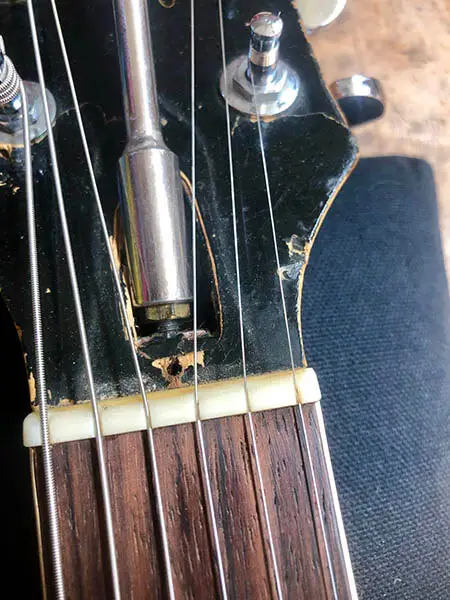
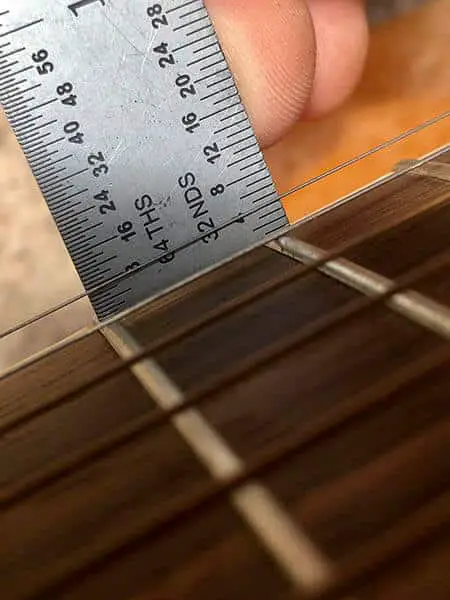
Take a look at the height of your strings over the first fret.
In theory, the nut is but a zero fret that is always fretted…so given that, the height of the strings over the showtime fret should be pretty close to the height of the strings over the 2nd fret when you have a capo at the first.
Use this as a rule of thumb, but I can tell you from experience that what y'all are looking for is slightly higher than what you lot see over the second fret. Open strings move a lot, and most players tend to hit open up chords a little harder, so requite yourself some cushion here.
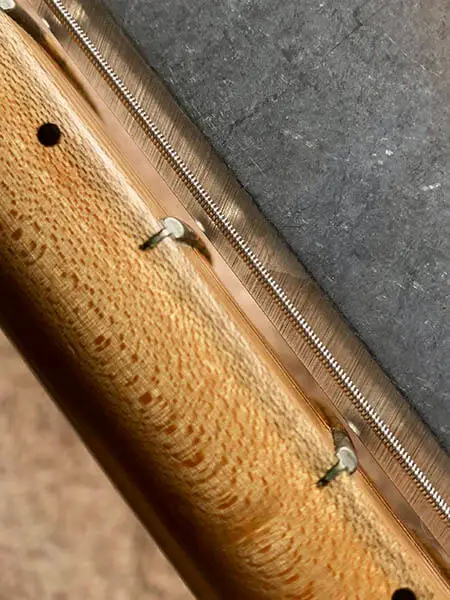
Lower the slot in pocket-size amounts with the corresponding estimate nut file at the angle of the arroyo of the string.
Make certain the slot is clean, put the string back, retune, and check to make sure it doesn't buzz and see how it feels when fretted. If information technology's not buzzing and nonetheless feels stiff, and looks high, remove a lilliputian more than material.
This is a tricky procedure and there is a very fine line between low enough and too depression. Go on in listen, you tin make any string fizz anywhere on the neck if you want to. Don't examination the cord, play information technology. Y'all are verifying that it doesn't buzz under normal playing atmospheric condition.
If your nut slots are already too depression and buzzy off of the starting time fret or you go too far, you take the same options as the saddle: replace or shim and recut it.
TIP: I do not advise filling the slot with anything. Information technology will only cause y'all tuning issues and whatever you put in there volition be temporary at best.
A proper nut is critical to the tone, feel, and tuning stability of your guitar, and there actually is no substitute for a well-made bone nut. Even so, making a perfect bone nut is very challenging and best left to a competent luthier, or perhaps the subject field of a future commodity.
For the purposes of this set up-up guide, I am bold your nut is functional but too high. This is often the instance even on brand new guitars. Adding more relief to your cervix will besides heighten the strings up off of the first fret, but I don't typically suggest sacrificing a straight neck to avoid replacing or shimming a nut.
Once y'all've set the neck, nut, and saddle, spend some time playing the guitar.
If yous are experiencing fret noise then make a note of where it is.
In a higher place on the neck or dying string bends can indicate saddle action that is too depression, at the end and middle of the neck can mean not plenty relief, and open notes are nigh always depression nut slots or a back bowed cervix.
Experiment with minor changes to each of these areas to meet what combination works best for you and the guitar.
Just remember, a modify to 1 of these three key factors ordinarily ways a alter to one or both of the other two, and then always recheck and adjust as needed.
Pace 8: Intonation
If you are setting up an electrical guitar, all that's left is to gear up the intonation.
Setting intonation involves adjusting the saddles so that the fretted 12th note matches the open up notation.
If the fretted note is sharp when compared to the open note, you volition motility the saddle back a small amount, retune and check over again until you are in tune on both. If it is flat, y'all will motility it forward.
This is the commonly accepted approach. All the same, I often do it differently.
I volition briefly explain and allow you decide which approach you adopt for your own style.
The guitar is an imperfect musical instrument, there are usually only ii verbal notes on each string: the open up annotation and the fretted note you choose to intonate (the twelfth or halfway point of the scale in most all cases.)
Every other note on the fretboard will be a footling sharp or flat. There is no law that says your twelfth fret has to be in melody, yous tin can choose anywhere you'd like.
There are ii things that occur to me when setting intonation. Commencement, the human ear tends to forgive a flat notation more than than a sharp i. Neither are great, only precipitous notes are more offensive to about people.
Second, when a guitar is in tune and intoned at the 12th fret, information technology tends to play a little sharp by the nut in the open chord range where many players spend virtually of their time.
So, I will unremarkably intonate a little flat at the 12th fret in order to bring the first position more in tune. I notice this reduces the overall amount of sharp notes going upward the fretboard in full general. I check the 12th fret and the 3rd fret and discover a compromise betwixt the ii, often going until the third fret is no longer precipitous at all.
If for some reason you play a lot of chords up the neck, this may not work for you lot, but in my experience, almost players fret chords toward the nut and play unmarried notes every bit they go to the end of the cervix, and nothing sours a chord more than sharp notes. You can experiment and see what you prefer for your playing manner.
Final Piece Of Communication
Setting up a guitar perfectly tin can be challenging. There are many things yous have to consider and it often requires trial and error until you find out what works best for the guitar and the actor.
The merely way to get skillful at information technology is to set upwards a lot of them, and the best place to begin is with your own guitar. Just remember…Yous have to find the residuum between your cervix, the nut, and the saddle.
Source: https://midlifeguitar.com/how-to-do-your-own-guitar-setup/
0 Response to "How To Set Up Guitar"
Post a Comment